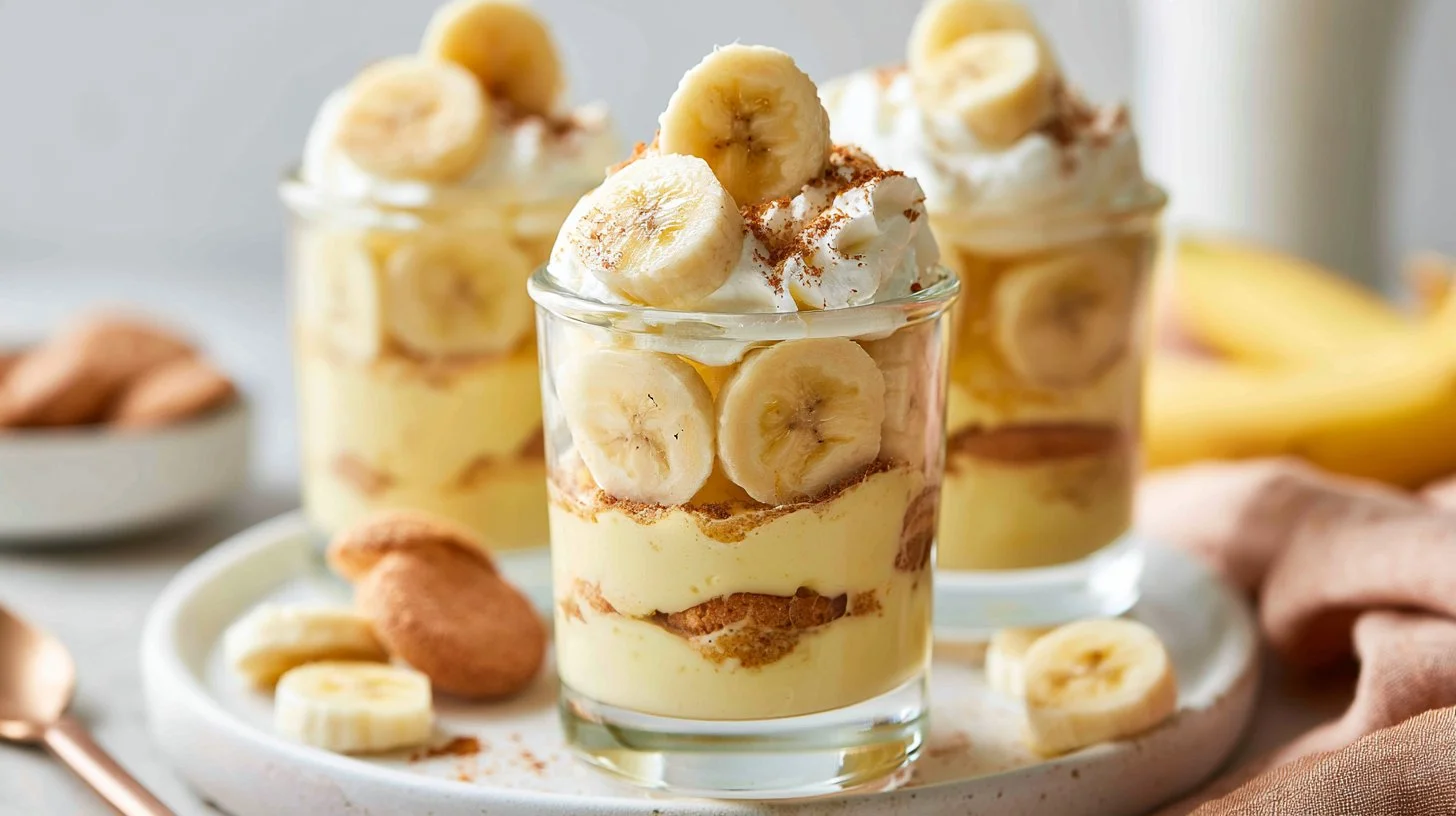
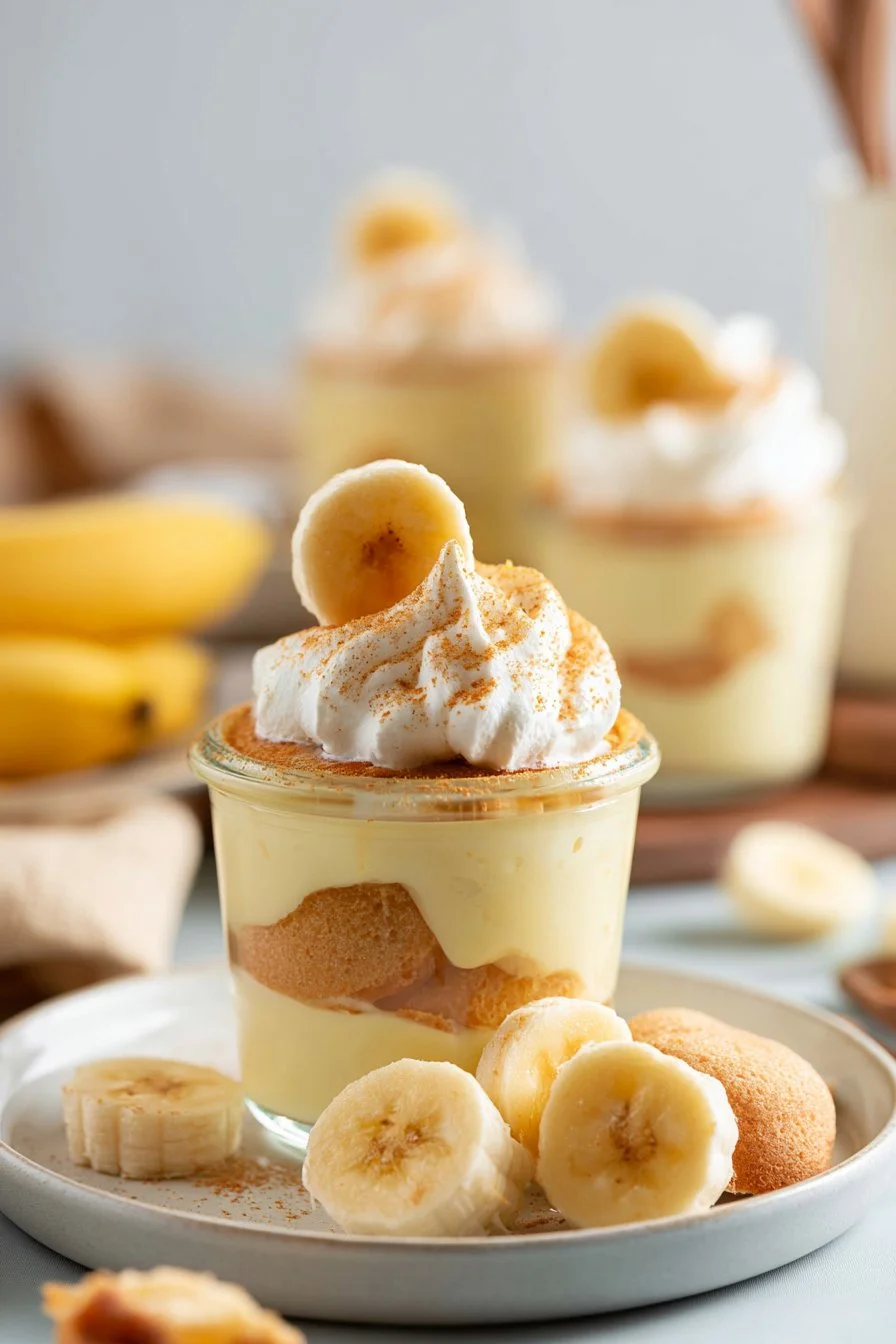
Homemade Banana Pudding Cups are a delightful dessert that brings comforting nostalgia with every creamy bite. This luscious dessert features layers of velvety banana pudding, fresh banana slices, and classic Nilla wafers, all topped off with a light and airy whipped cream. Perfect for warm evenings, family gatherings, or simply to satisfy your sweet tooth, these pudding cups are an irresistible treat that will leave everyone wanting more.
What makes these Homemade Banana Pudding Cups special is not just their taste but also their appeal. Each layer brings a different texture, with the soft custard, fruity banana, and crunchy wafers creating an experience that is both satisfying and delicious. The creamy filling melts in your mouth, while the fresh bananas provide a burst of fruity goodness, and the whipped cream adds an extra touch of indulgence. Whether you’re serving them at a picnic, a potluck, or as a cozy dessert after dinner, they’re sure to impress.
Why You’ll Love This Recipe
- Simplicity: With straightforward ingredients and easy steps, making these pudding cups is a breeze.
- Flavor Explosion: The combination of rich vanilla, fresh bananas, and the crunch of Nilla wafers creates a delightful flavor profile.
- Make-Ahead Delight: These cups can be prepared in advance, allowing you to enjoy more time with your guests or simply kick back with a good book.
- Family-Friendly: Kids and adults alike will adore this classic dessert, making it a guaranteed hit for gatherings.
- Versatile Presentation: Serve them in cute jars or elegant glasses for a perfect dessert at any occasion.
What Makes This Recipe Special
This recipe stands out not just for its nostalgic ties but also for its homemade charm. The ingredients come together to create an incredibly silky pudding that is both sweet and satisfying. Whole milk gives a rich flavor, while the right balance of sugar and cornstarch ensures the pudding achieves a luxurious consistency. The addition of banana extract (though optional) enhances the banana flavor, making each bite even more delightful. The layer of freshly sliced bananas and Nilla wafers contributes unique textures; the cool creaminess of the pudding and the gentle crunch of the wafers create a dessert unlike any other.
Ingredients
- 4 cups whole milk: The base for our pudding, offering creaminess and richness.
- 1 cup granulated sugar: Sweetens the pudding to perfection.
- 1/4 cup cornstarch: Thickens the pudding, giving it that classic custard-like consistency.
- 1/4 teaspoon kosher salt: Enhances the sweetness and balances the flavors.
- 4 large egg yolks: Serve as a rich binding agent and contribute to the pudding’s thickness.
- 2 tablespoons unsalted butter, room temperature: Adds creaminess and depth of flavor.
- 1 tablespoon vanilla extract: Provides a warm, aromatic flavor to the pudding.
- 1 teaspoon banana extract (optional): Enhances the banana flavor if desired.
- 2 cups heavy whipping cream: Used for the whipped topping, creating a light and fluffy finish.
- 1/2 cup powdered sugar: Sweetens the whipped cream while stabilizing it.
- 1 teaspoon vanilla extract: Flavoring for the whipped cream.
- Sliced bananas: The star fruit that adds freshness and flavor.
- Nilla wafers: Classic cookies that provide a delightful crunch.
Ingredient Notes and Easy Substitutions
- If you prefer a lighter pudding, consider using low-fat milk to replace some of the whole milk, but keep in mind that it may alter the richness slightly.
- For a dairy-free option, swap the milk for almond, soy, or oat milk and use coconut cream for the whipped topping.
- You can also substitute granulated sugar with coconut sugar or a natural sweetener like honey, though this may change the flavor profile slightly.
Instructions
- Scald the milk: Start by heating 4 cups of whole milk in a large pot over medium heat until it’s almost boiling, stirring occasionally to prevent it from scorching.
- Combine dry ingredients: In a large saucepan, mix together the cornstarch, granulated sugar, and kosher salt. Gradually add the heated milk, about 1/2 cup at a time, whisking constantly to create a smooth mixture.
- Thicken the pudding: Once the filling begins to thicken, continue adding milk until fully incorporated. Remove the pot from heat once you achieve a thicker consistency.
- Temper the egg yolks: Pour about 1/2 cup of the thickened filling into a glass measuring cup and slowly drizzle it into the beaten egg yolks, whisking constantly to temper the eggs. This prevents the yolks from cooking too quickly.
- Cook the egg mixture: Return the tempered egg mixture back into the pot with the remaining filling. Cook for an additional 2-3 minutes until the pudding thickens to the desired consistency.
- Add flavor and chill: Stir in the room-temperature butter and vanilla extract, along with the banana extract if you are using it. Strain the pudding through a fine mesh strainer into a bowl and chill in the fridge for at least 1 hour to set.
- Prepare the whipped cream: While the pudding is chilling, in a mixer, combine heavy whipping cream, powdered sugar, and vanilla extract. Whip until stiff peaks form and the cream holds its shape.
- Assemble the cups: To prevent browning, toss the banana slices in a bit of lemon juice. In each serving jar, place 3-4 Nilla wafers at the base, add a layer of pudding, followed by a layer of banana slices, and then a layer of whipped cream. Repeat the layers until the jars are full.
- Final chill: Chill the assembled pudding cups in the refrigerator for at least 2 hours before serving, which allows the Nilla wafers to soften slightly and the flavors to meld together beautifully.
Expert Tips for the Best Results
- Whisk constantly while combining the milk and cornstarch mixture to avoid lumps.
- For a smoother pudding, strain through a fine mesh strainer; this removes any bits of egg or cooked cornstarch.
- When assembling the cups, slightly under-layer the layers to make room for more whipped cream on top for that lovely visual appeal.
- To get beautiful whipped cream, make sure your mixing bowl and the whisk are thoroughly chilled before whipping the cream.
Variations
- Chocolate Banana Pudding: Add a few tablespoons of cocoa powder to the pudding mixture for a rich chocolate twist.
- Peanut Butter Banana Pudding: Incorporate smooth or crunchy peanut butter into the pudding for a delectable combination of flavors.
- Tropical Twist: Add diced pineapples to the layers for an exotic addition that pairs well with bananas.
- Layer of Granola: Instead of wafers, use crushed granola for a crunchy and healthier twist.
- Nutty Flavor: Sprinkle chopped pecans or walnuts between the layers for added texture and flavor.
Serving Suggestions
Homemade Banana Pudding Cups are delightful on their own, but pair them with a warm slice of chocolate cake or a scoop of vanilla ice cream for an indulgent dessert platter. For drinks, a chilled glass of sweet iced tea or a tropical smoothie would complement the flavors perfectly. Garnish your cups with additional banana slices or a sprinkle of crushed Nilla wafers for visual appeal and presentation.
Storage and Reheating
These pudding cups can be made in advance and stored in the fridge for up to 3 days. Keep them covered with plastic wrap or a tight lid to ensure fresh flavors. Although these cups are best served cold, if you would like to reheat the pudding (without the bananas or whipped cream), warm it gently on the stove over low heat, stirring often until just warmed through. However, it’s best enjoyed chilled.
Common Mistakes to Avoid
- Avoid adding the egg yolks directly into the hot filling without tempering them first; this could result in scrambled eggs in your pudding.
- Don’t skimp on chilling the pudding after making, as this allows it to set properly and develop its flavor.
- If making the whipped cream, ensure not to over-whip as this can lead to curdled cream.
FAQ
Can I use ripe bananas for this recipe?
Absolutely! Ripe bananas are sweeter and have more flavor, making them perfect for this dessert.
How can I prevent the bananas from browning?
Toss the banana slices in a little lemon juice before layering them in the cups. This will keep the bananas looking fresh and appealing!
Can I freeze the pudding cups?
While the pudding itself can be frozen, the texture will change once thawed, especially the whipped cream and bananas. It’s best to enjoy them freshly made or within a few days.
Is there a way to make this recipe gluten-free?
Yes, simply replace the Nilla wafers with gluten-free cookies or graham crackers, and ensure all other ingredients are certified gluten-free.
Can I reduce the sugar in this recipe?
You can certainly experiment with reducing the sugar or using a sugar substitute; keep in mind that this may alter the final flavor and texture slightly.
How long do these pudding cups need to chill before serving?
For best results, chill the assembled cups for at least 2 hours. This allows the wafers to soften and the flavors to meld beautifully.
Conclusion
Homemade Banana Pudding Cups are a timeless dessert that combines unpretentious ingredients into a comforting and delightful treat. They are not only easy to make but also bring back fond memories of family feasts and shared moments. Whether you are entertaining guests or enjoying a quiet evening at home, this recipe is sure to impress. Give it a try, and don’t forget to share it with friends and family—they’ll be thanking you for introducing them to this classic delight! Save this recipe for your next gathering, and watch it become a beloved staple in your dessert rotation.