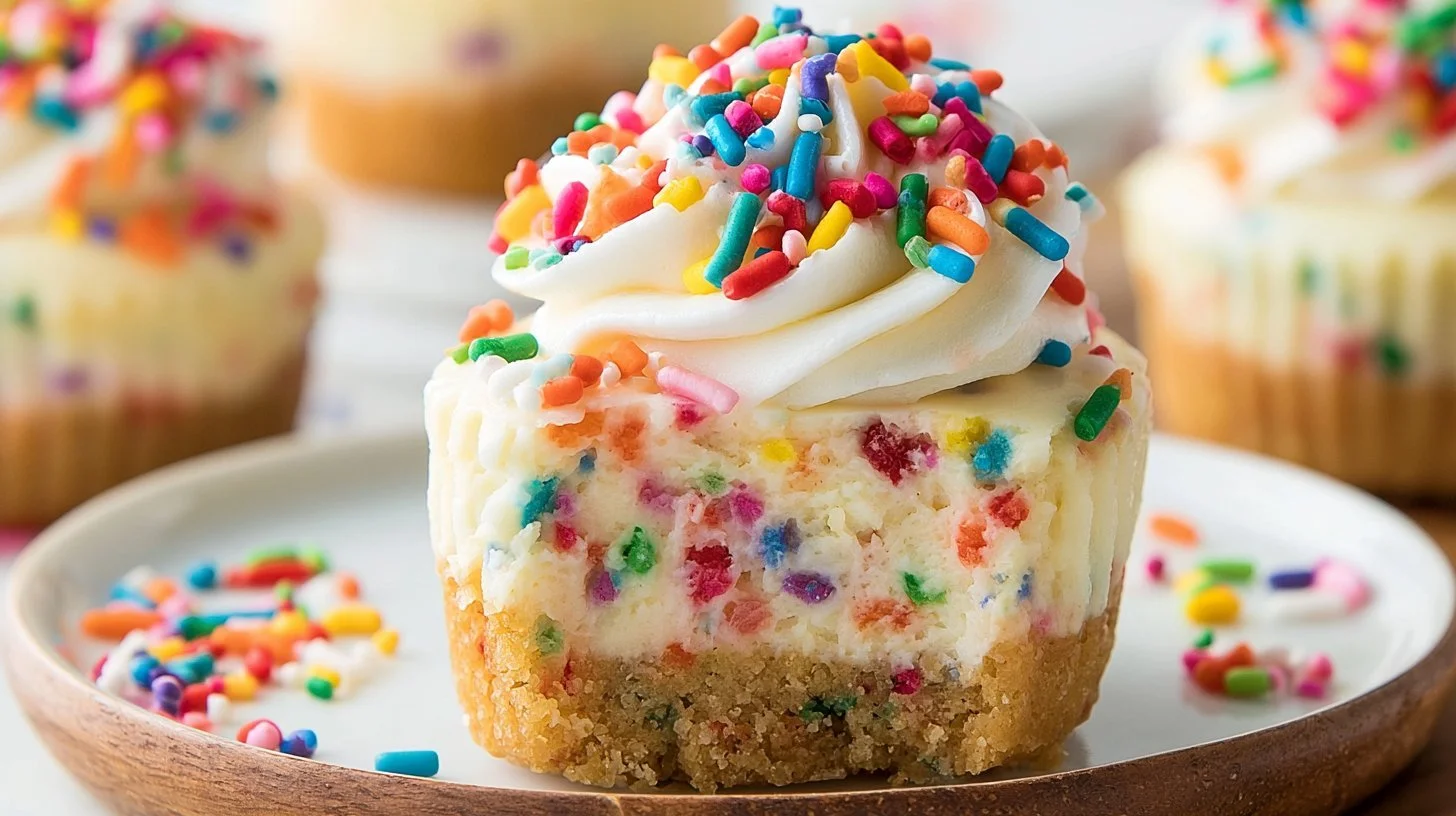
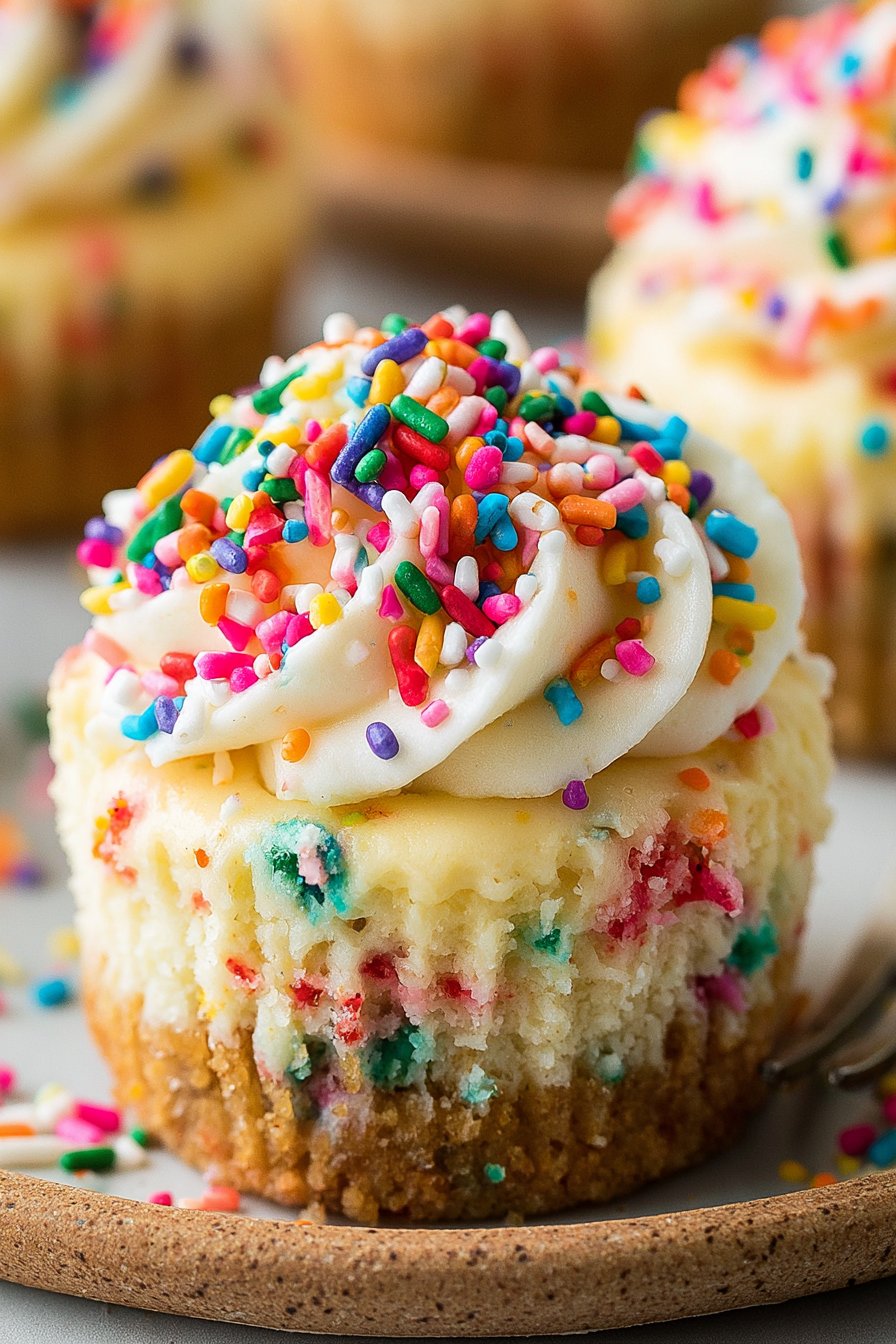
Mini Funfetti Cheesecakes are the perfect indulgence when you’re in the mood for something that feels festive yet simple to make. These delightful little treats combine the creamy decadence of cheesecake with the playful pop of colorful sprinkles, creating a dessert that is both visually appealing and absolutely delicious. Whether you’re celebrating a birthday, hosting a party, or just want to bring some joy to an ordinary day, these cheesecakes are sure to please. The balance of a buttery graham cracker crust with a smooth, creamy filling makes for a delightful texture that your taste buds will thank you for!
What makes these Mini Funfetti Cheesecakes extra special is not just the cheerful rainbow sprinkles but also the ease of preparation. They come together quickly and chill beautifully, making them a great make-ahead dessert option. Plus, their mini size means you can enjoy a satisfying portion without feeling overwhelmed. Get ready to whip up this fun and flavorful dessert that everyone will adore!
Why You’ll Love This Recipe
- Quick & Easy: With straightforward steps, you’ll have these cheesecakes ready in no time.
- Festive Appearance: The rainbow sprinkles add a pop of color, making them perfect for celebrations.
- Rich & Creamy Texture: The full-fat cream cheese creates a luscious filling that melts in your mouth.
- Flexible Serving Options: They’re perfect for parties, family gatherings, or simply as a sweet treat at home.
- Make-Ahead Delight: They can be made in advance and stored in the fridge, making your hosting stress-free.
- Kid-Friendly: The fun colors and simple flavors make them a hit with children and adults alike!
What Makes This Recipe Special
These Mini Funfetti Cheesecakes stand out because they seamlessly blend creamy cheesecake with the delightful crunch of a graham cracker crust, all topped off with vibrant jimmie sprinkles. The combination of the rich, textured filling and the sweet, slightly nutty crust creates a mouthwatering balance that keeps you coming back for more. Each bite is loaded with festive sprinkles, giving an inviting, celebratory feel to this classic dessert.
The full-fat cream cheese serves as the backbone of the cheesecake, providing a rich and velvety texture that is perfectly complemented by the sweetness of sugar and the warmth of vanilla. Whether you’re drooling over the thought of it or actually indulging in a bite, the Mini Funfetti Cheesecakes promise a joyful experience with each mouthful.
Ingredients
- 1 cup (113g) graham cracker crumbs
- 1/4 cup rainbow jimmie sprinkles
- 4 Tbsp (57g) unsalted butter (melted, 1/2 stick)
- 16 oz (452g) full-fat cream cheese (room temperature)
- 1/4 cup (50g) sugar
- 1 tsp vanilla extract
- 2 large eggs (added one at a time)
- 1/3 cup rainbow jimmie sprinkles
Ingredient Notes and Easy Substitutions
When preparing these delightful Mini Funfetti Cheesecakes, it’s crucial to use full-fat cream cheese for that rich, creamy consistency. If you’re looking for alternatives, you can substitute it with Neufchâtel cheese for a slightly lighter option. Additionally, if you’re short on graham crackers, crushed digestive biscuits or vanilla wafers can work nicely for the crust.
As for the sprinkles, you can use any variety you have on hand, but classic rainbow jimmies give that quintessential funfetti look. If you prefer, experiment with themed sprinkles for seasonal treats.
Instructions
- Preheat your oven to 325°F (163°C).
- In a medium bowl, mix the graham cracker crumbs, melted butter, and 1/4 cup of rainbow sprinkles until well combined.
- Divide the mixture evenly among a 12-cup muffin pan lined with cupcake liners, pressing down firmly to form a crust.
- Pre-bake the crust in the oven for about 5-7 minutes, until set and slightly golden. Remove from the oven and let cool while preparing the filling.
- In a large mixing bowl, beat the softened cream cheese until smooth and creamy, about 2-3 minutes.
- Add the sugar and vanilla extract, mixing until well incorporated.
- Add the eggs one at a time, ensuring each is fully incorporated before adding the next.
- Gently fold in the remaining 1/3 cup of rainbow jimmie sprinkles.
- Evenly pour the cheesecake mixture over the prepared crusts.
- Bake for 20-25 minutes, or until the centers are set but still slightly jiggly.
- Allow the cheesecakes to cool completely at room temperature, then refrigerate for at least 3 hours before serving.
Expert Tips for the Best Results
- Use Room Temperature Ingredients: Make sure your cream cheese and eggs are at room temperature for a smooth batter; this will prevent lumps in your cheesecake.
- Don’t Overbake: The cheesecakes should be slightly jiggly in the center when you take them out. They will continue to set as they cool.
- Chill Thoroughly: Ensure the cheesecakes cool completely before refrigerating; this helps develop their flavors.
- Garnish Creatively: Consider topping with whipped cream and extra sprinkles before serving for an extra touch of fun.
Variations
- Chocolate Chip Funfetti Cheesecakes: Mix in mini chocolate chips into the cheesecake mixture for a decadent twist.
- Coconut Funfetti Cheesecakes: Add shredded coconut to the crust for a tropical finish.
- Sugar-Free Options: Switch the sugar for a sugar substitute if you’re watching your sugar intake.
- Fruit-Topped: Serve with a layer of fresh fruit like strawberries or blueberries on top for a refreshing touch.
- Halloween or Holiday Themes: Customize the sprinkles to match the season—use orange and black for Halloween or red and green for Christmas!
Serving Suggestions
Mini Funfetti Cheesecakes go wonderfully with fresh fruit, whipped cream, or a drizzle of chocolate. They also pair nicely with a cup of coffee or a glass of milk. Serve them on a colorful platter to highlight their festive appearance, and don’t forget to keep a few sprinkles on hand for that final touch!
Storage and Reheating
Store any leftover Mini Funfetti Cheesecakes in an airtight container in the refrigerator for up to one week. They can also be frozen, although it’s best to consume them fresh for optimal flavor and texture. To thaw, place them in the refrigerator overnight before serving.
Common Mistakes to Avoid
- Skipping the Cooling Time: Allowing the cheesecakes to cool completely before refrigerating is essential for the ideal texture.
- Overmixing the Filling: Be mindful when adding the eggs; overmixing can introduce too much air, leading to cracks in the surface.
- Neglecting the Crust: Ensure the crust is pressed down firmly enough to hold its shape while baking and cooling.
FAQ
What size muffin pan do I need for Mini Funfetti Cheesecakes?
You’ll need a standard 12-cup muffin pan, lined with cupcake liners to help with easy removal.
Can I use low-fat cream cheese in this recipe?
While you can use low-fat cream cheese, the texture may differ slightly, resulting in a less decadent cheesecake.
How long do these cheesecakes last in the fridge?
They can be stored in the fridge for up to one week in an airtight container.
Can I freeze Mini Funfetti Cheesecakes?
Yes! Just be sure to wrap them tightly in plastic wrap and store in an airtight container. They can last up to three months in the freezer.
What if I can’t find rainbow jimmie sprinkles?
Feel free to substitute with any colored sprinkles you have, or experiment with other fun toppings like crushed Oreos or toffee bits.
How do I know when the cheesecakes are done baking?
Look for the edges to be set while the center is still slightly jiggly. They will firm up as they cool.
Conclusion
Mini Funfetti Cheesecakes are not just a treat; they’re a celebration waiting to happen! With their delightful flavor, creamy texture, and festive appearance, these cheesecakes are the perfect dessert for any occasion. Whether it’s a birthday party, holiday gathering, or simply a fun family dessert night, these cheesecake bites are bound to put smiles on faces. So gather your ingredients, follow the steps, and get ready to enjoy these sweet little bites of happiness. Don’t forget to share and save this recipe to make later. Happy baking!